1. Getting Started
Create your account, explore the dashboard, and learn how to navigate the platform.
Head to the registration page and enter your name, email, and company details. No credit card is required — you get 14 days free.
Check your inbox for a verification link. Click it to activate your account and set your password.
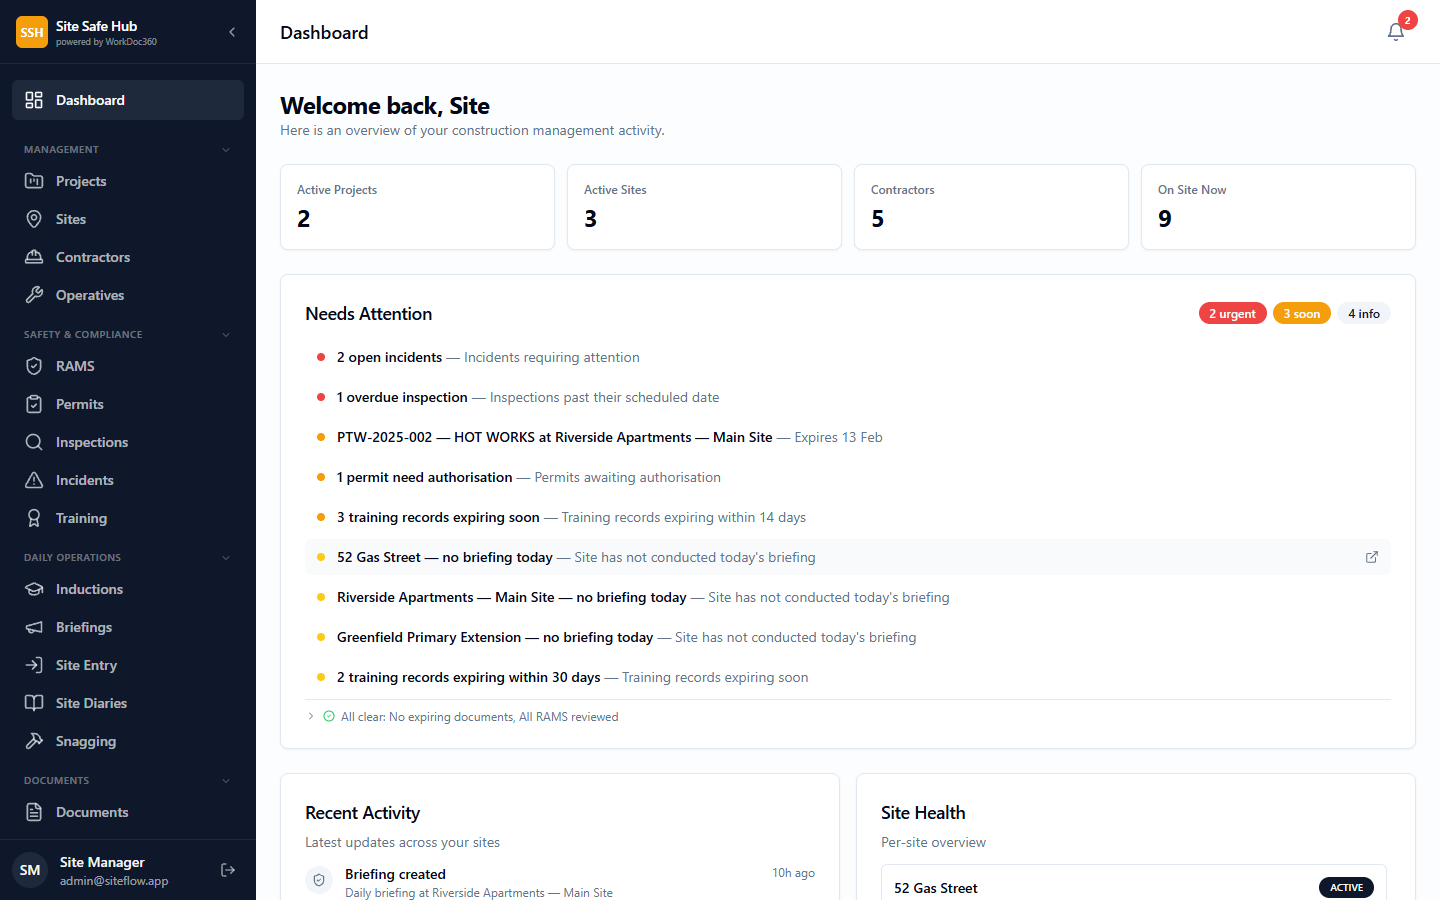
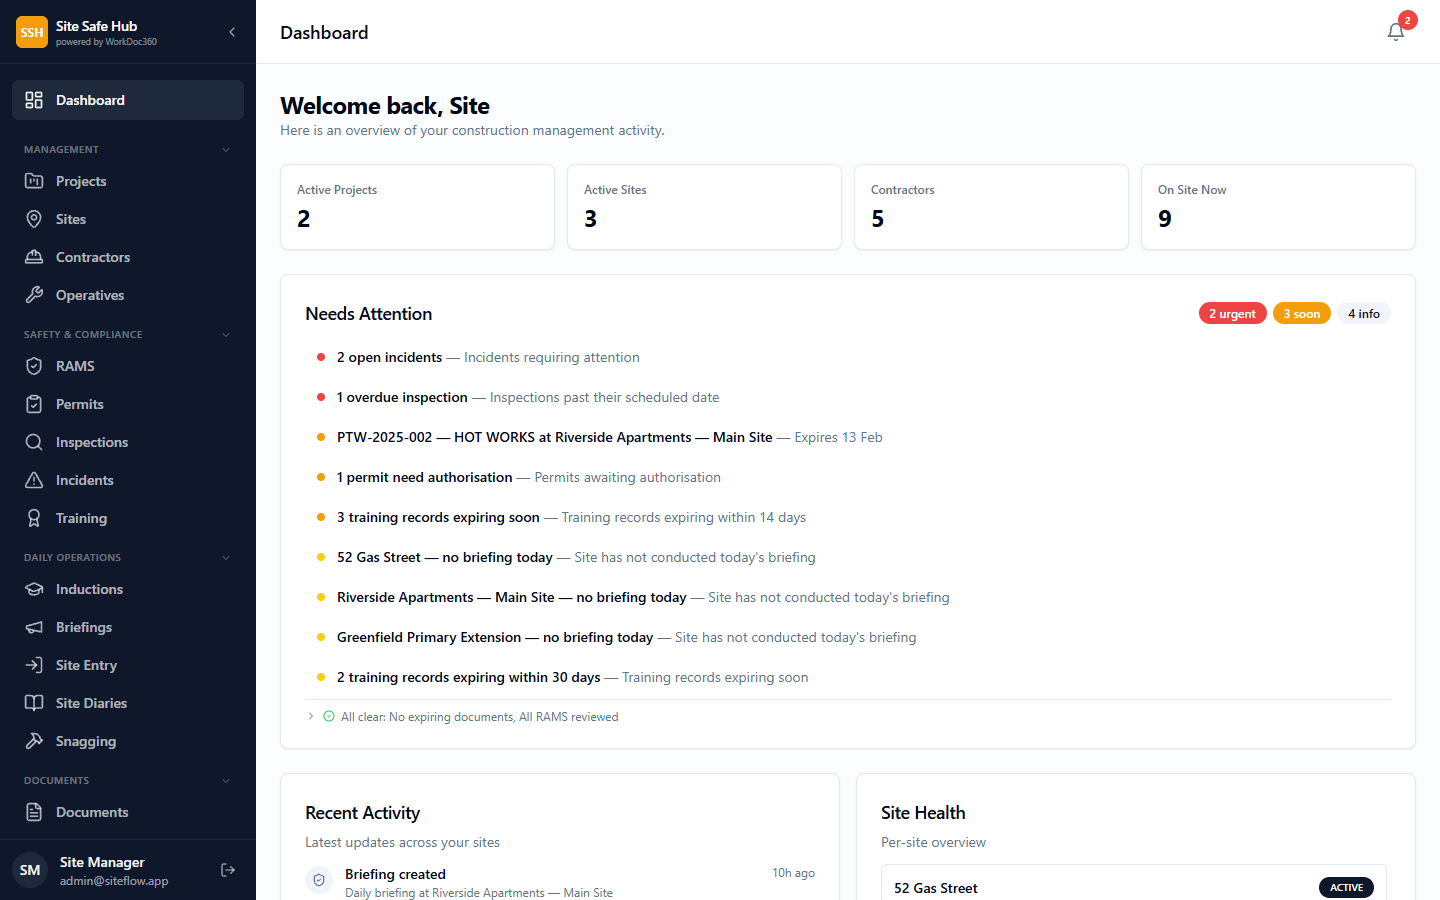
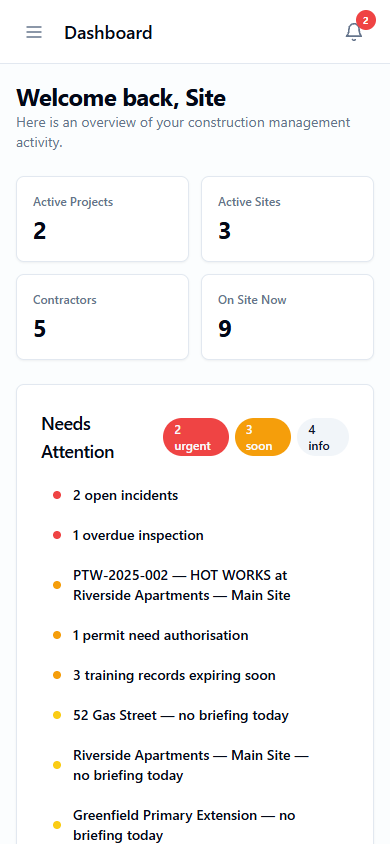
Your dashboard shows real-time safety metrics, recent activity, upcoming permit expiries, and quick-action buttons for common tasks.
The left sidebar gives you access to every module: permits, inspections, incidents, RAMS, contractors, documents, drawings, and settings. On mobile, tap the menu icon to open it.
Tip: Use the search bar at the top of any page to quickly find sites, contractors, incidents, or permits by name or reference number.
2. Setting Up Your Organisation
Create projects, add sites with addresses and postcodes, invite team members, and configure your organisation settings.
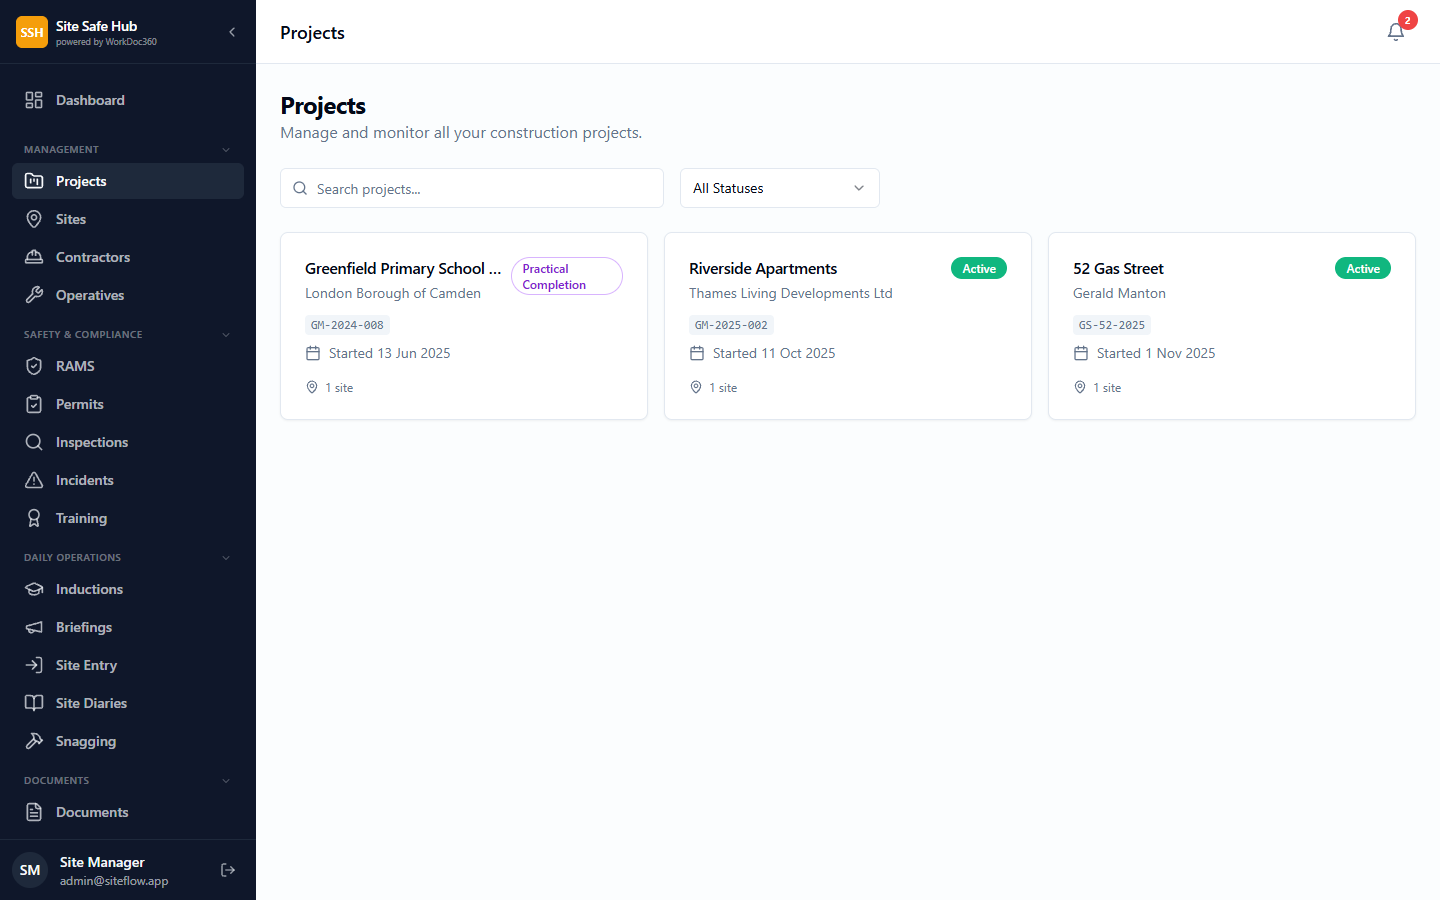
Go to Projects and click “New Project”. Enter the project name, client, and expected dates. Projects group related sites together.
Within a project, add one or more sites. Enter the site address, postcode, and emergency contact details. Each site gets its own QR code for sign-in.
Head to Settings > Team and invite colleagues by email. Assign roles (Admin, Project Manager, Site Manager, or Viewer) to control what each person can see and do.
Upload your company logo, set working hours, define permit types, and configure notification preferences.
Tip: Set up your site's emergency contacts and welfare facilities early — these details appear on every induction and briefing automatically.
3. Managing Contractors
Add contractors, track insurance and SSIP status, manage approval workflows, and give contractors access to their own portal.
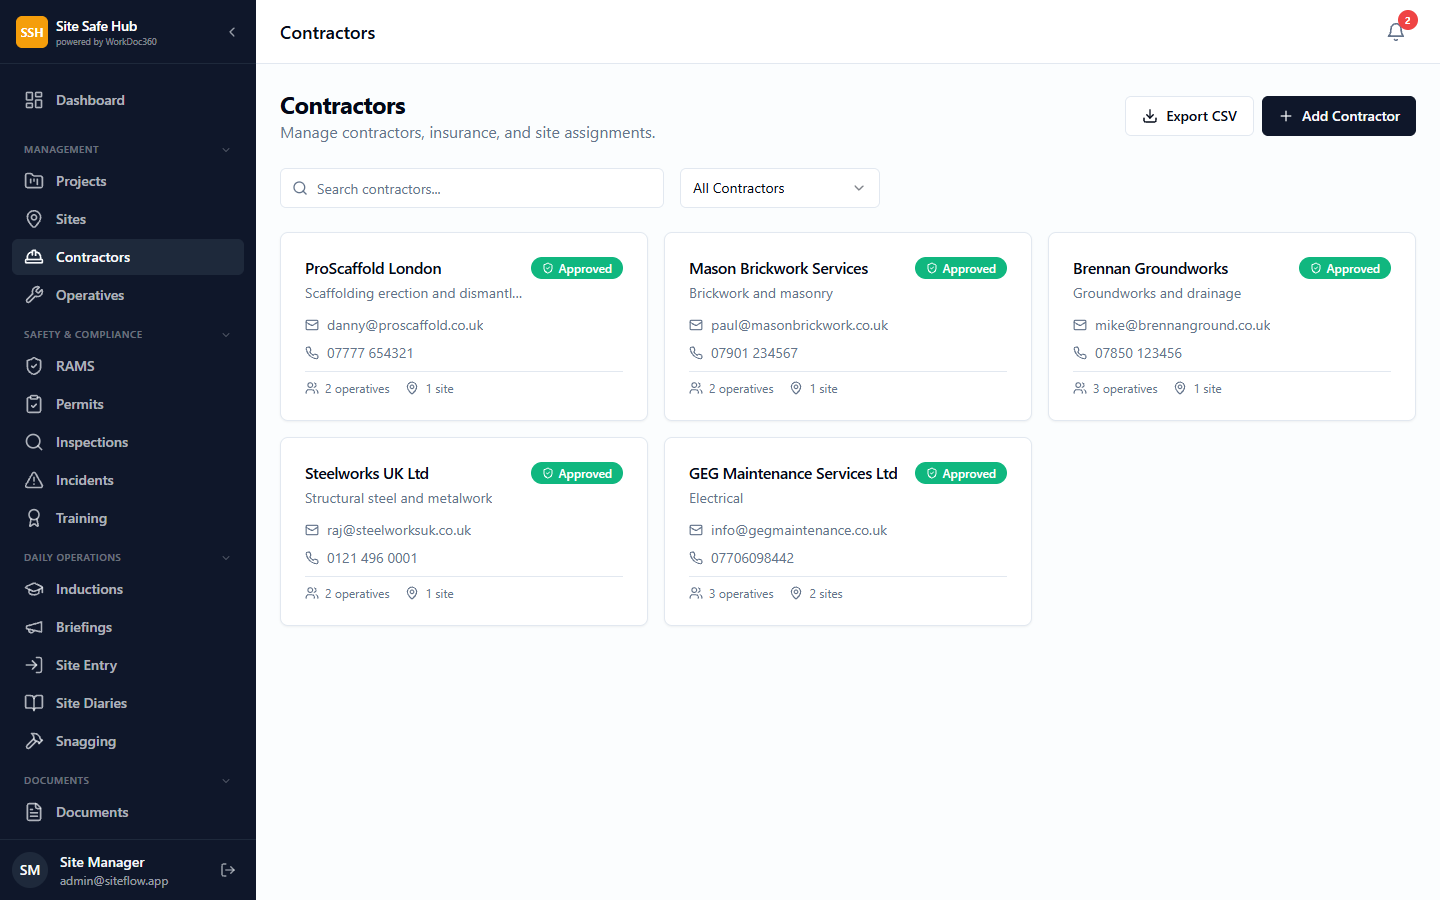
Go to Contractors > “Add Contractor”. Enter the company name, primary contact, and trade. Invite them to the contractor portal by email.
Upload Employers’ Liability, Public Liability, and Professional Indemnity certificates. Set expiry dates for automatic reminders. Track SSIP and Constructionline status.
Review each contractor’s compliance profile. Mark them as approved to allow site access, or flag outstanding issues for follow-up.
Link contractors to specific projects and sites. Their operatives will then appear in the site’s sign-in list and briefing attendance.
Tip: Contractors receive automatic email reminders 30 days before their insurance expires, so you can stay on top of compliance without chasing.
4. Site Entry & Sign-In
Use QR codes for site sign-in, run gate checks, monitor who is on site in real time, and handle visitor access.
Each site has a unique QR code. Print it and place it at the gate, or display it on a tablet at the site entrance.
Workers scan the QR code with their phone camera. They confirm their identity and are signed in instantly. The system runs automatic gate checks for induction status, insurance, and RAMS.
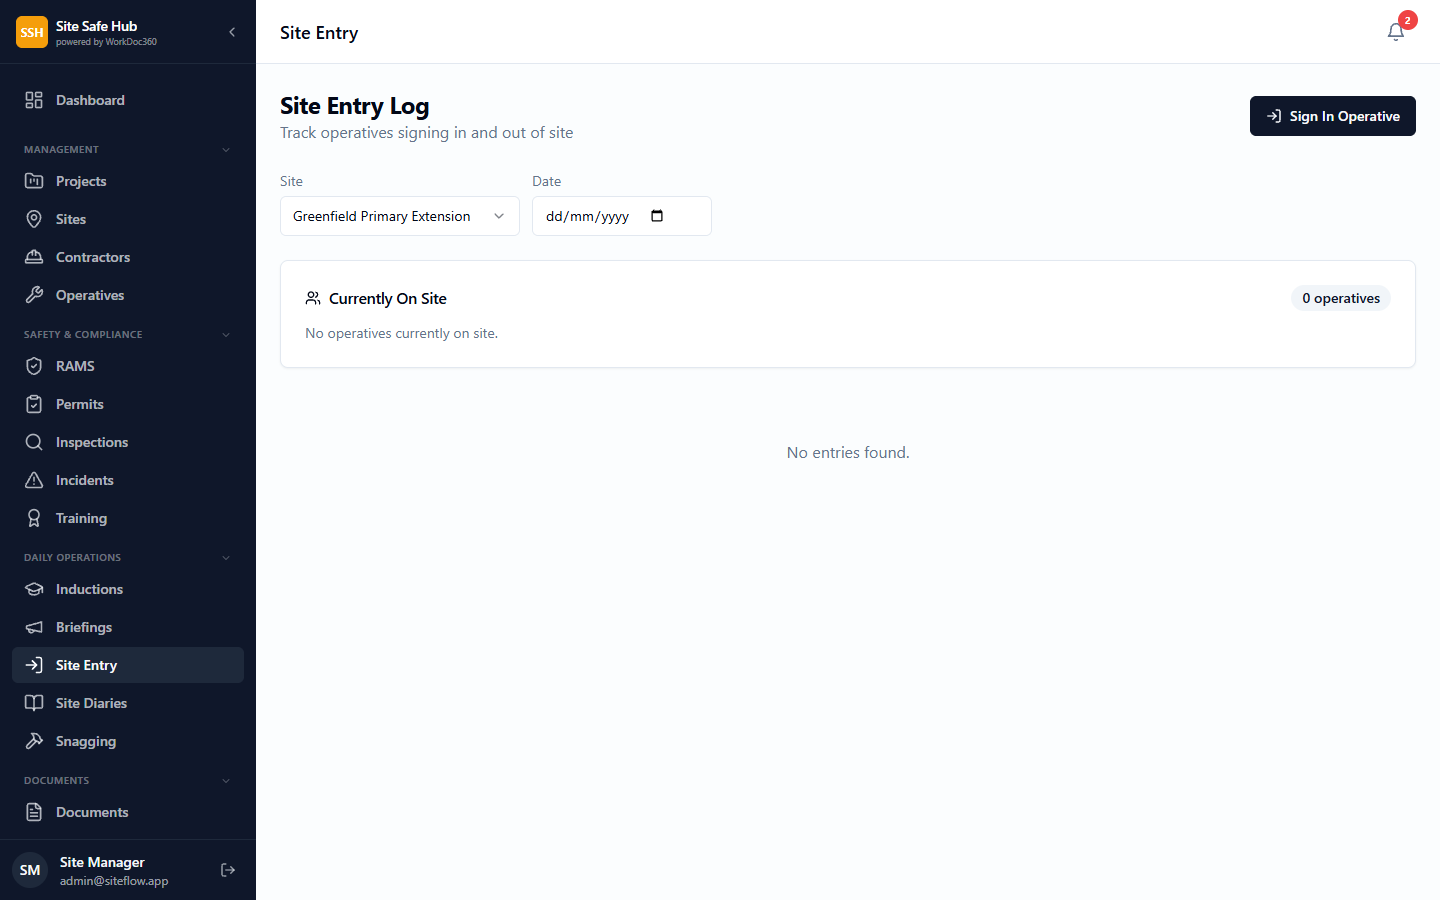
View who is on site right now from the Site Register page. See arrival times, contractor names, and any gate check warnings.
Workers sign out by scanning the QR code again or tapping “Sign Out” in the app. Visitors can sign in without a full induction — their access is flagged as visitor-only.
Tip: The live site register doubles as your emergency roll-call list. In an evacuation, you know exactly who is on site at any moment.
5. Daily Briefings
Run morning briefings, record operative attendance, cover safety topics, and document planned activities for the day.
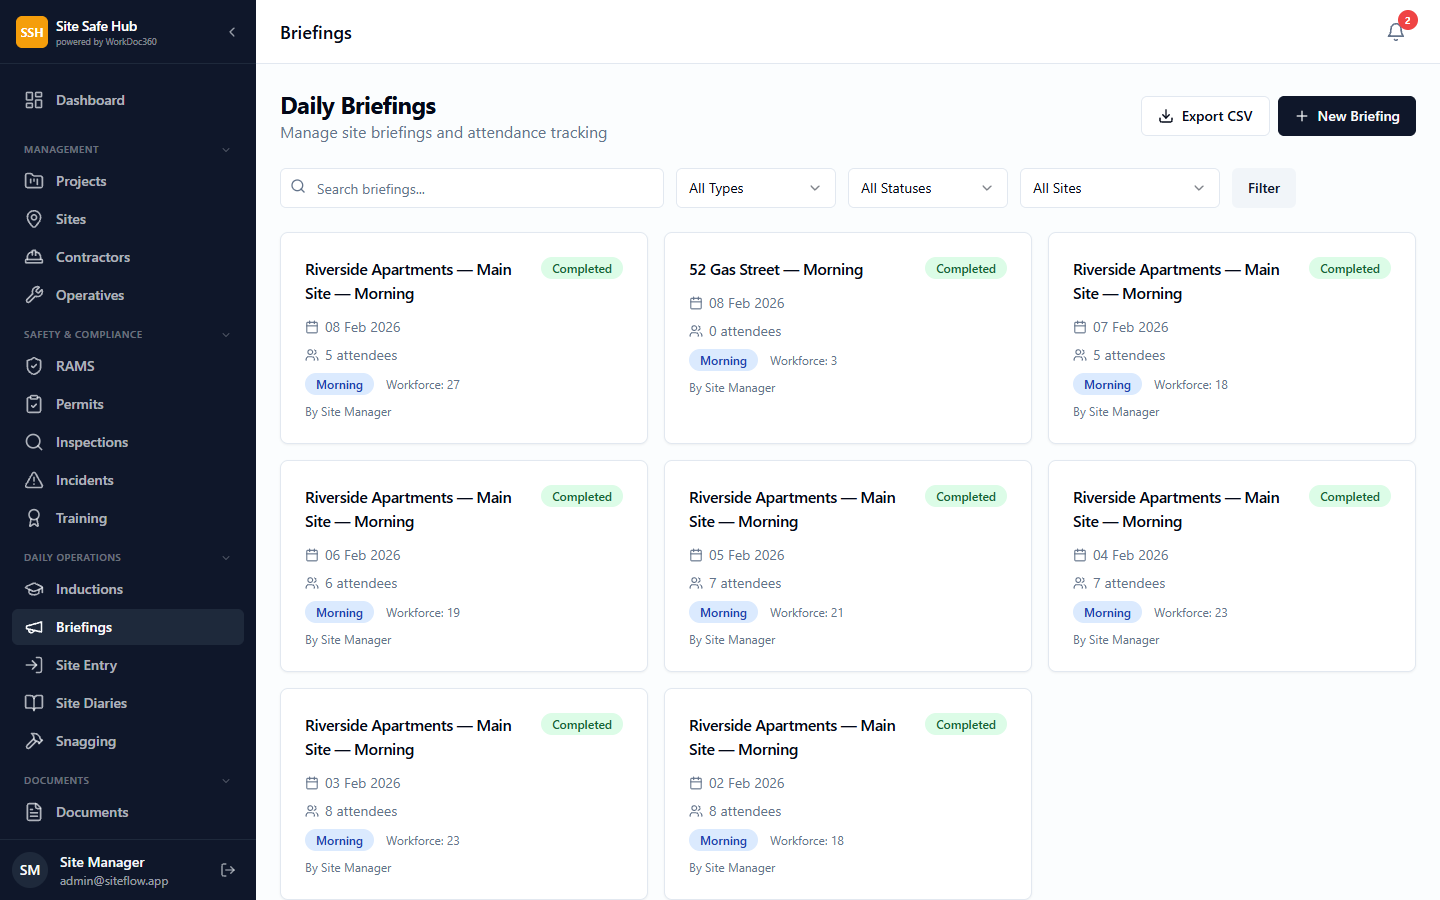
Go to Briefings > “New Briefing”. Select the site and date. Add weather conditions, planned activities, active permits, and any safety points to cover.
Open the briefing on your phone or tablet. The platform pulls in operatives who are already signed in on site so you can take attendance quickly.
Tick off each operative who attended. Anyone not present is recorded automatically. The attendance list links to the contractor and induction records.
Mark the briefing as complete. It is saved with a full audit trail — date, time, attendees, topics covered, and who delivered it.
When you select a site, the form auto-populates with yesterday’s unresolved hazards, active permits for the site, and the current workforce count. Review and adjust before starting.
Tip: Active permits for the site are automatically shown on the briefing, so everyone knows what high-risk work is happening that day.
Tip: The auto-fill pulls active permits and carries forward unresolved hazards from your last briefing. Always review before starting — conditions change overnight.
6. Permits to Work
Create, issue, monitor, and close permits for high-risk activities such as hot works, confined spaces, excavation, and working at height.
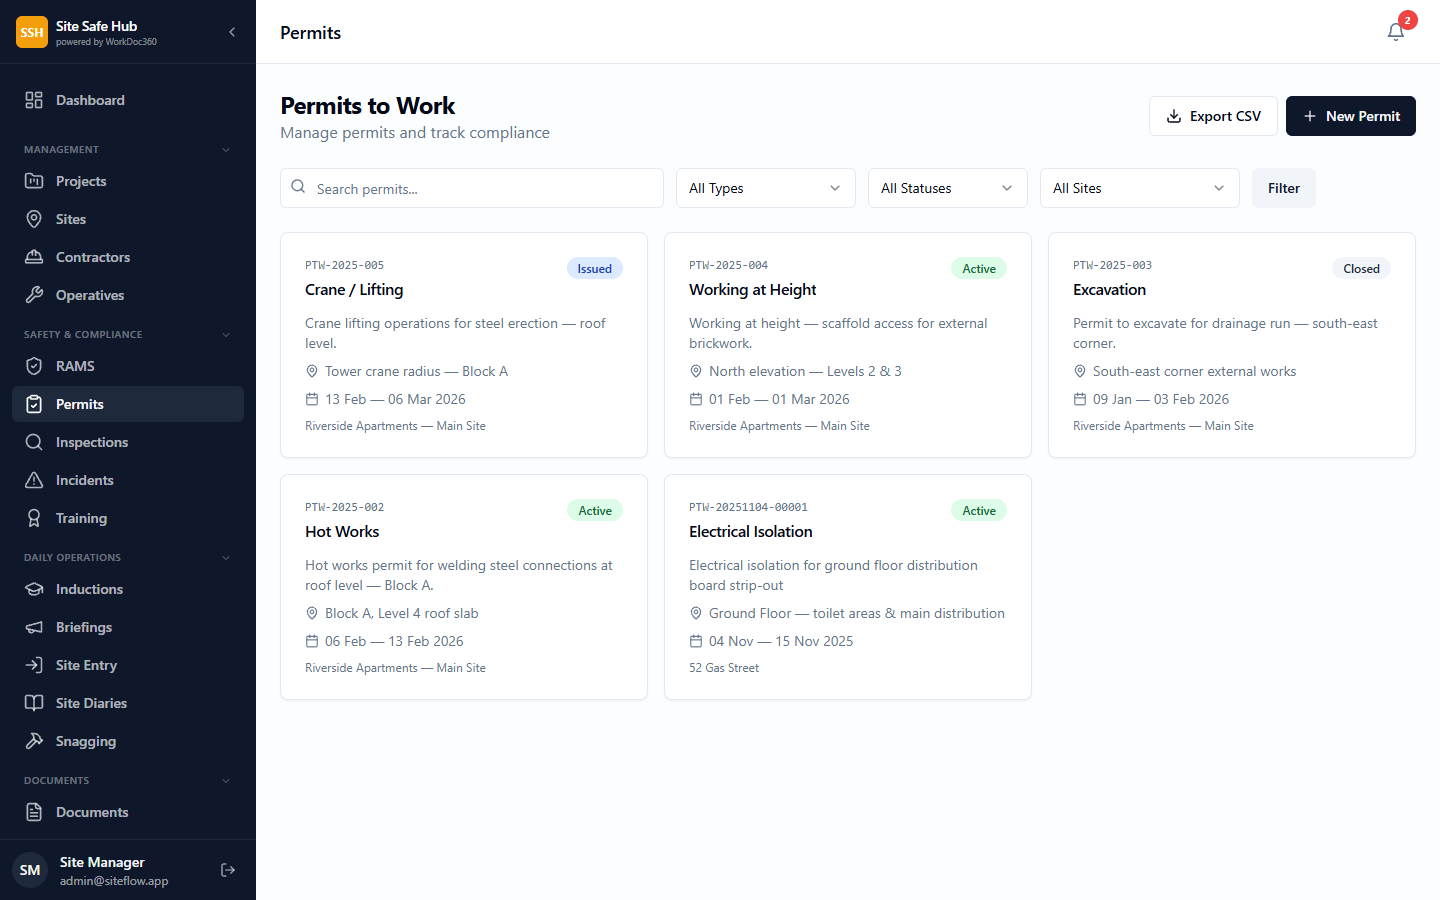
Go to Permits > “New Permit”. Select the permit type (hot works, confined space, excavation, electrical isolation, working at height, crane lift, etc.). Fill in the location, duration, control measures, and responsible person.
Review the details and issue the permit. It moves to “Active” status. The assigned contractor and operatives are notified.
Track all active permits from the dashboard. Colour-coded badges show status at a glance: draft, active, expiring soon, and closed. Filter by site, type, or date range.
Once the work is done, close the permit with close-out notes. Permits that pass their end time are automatically flagged as expired.
Select operatives who will work under this permit directly on the creation form. They’ll be linked to the permit immediately — no need to navigate back and assign separately.
Tip: Permits nearing expiry trigger automatic notifications. Set up alerts so you never have an expired permit on an active site.
7. Incident Reporting
Report accidents, near misses, dangerous occurrences, and environmental incidents. Investigate with AI-assisted analysis and track corrective actions to close-out.
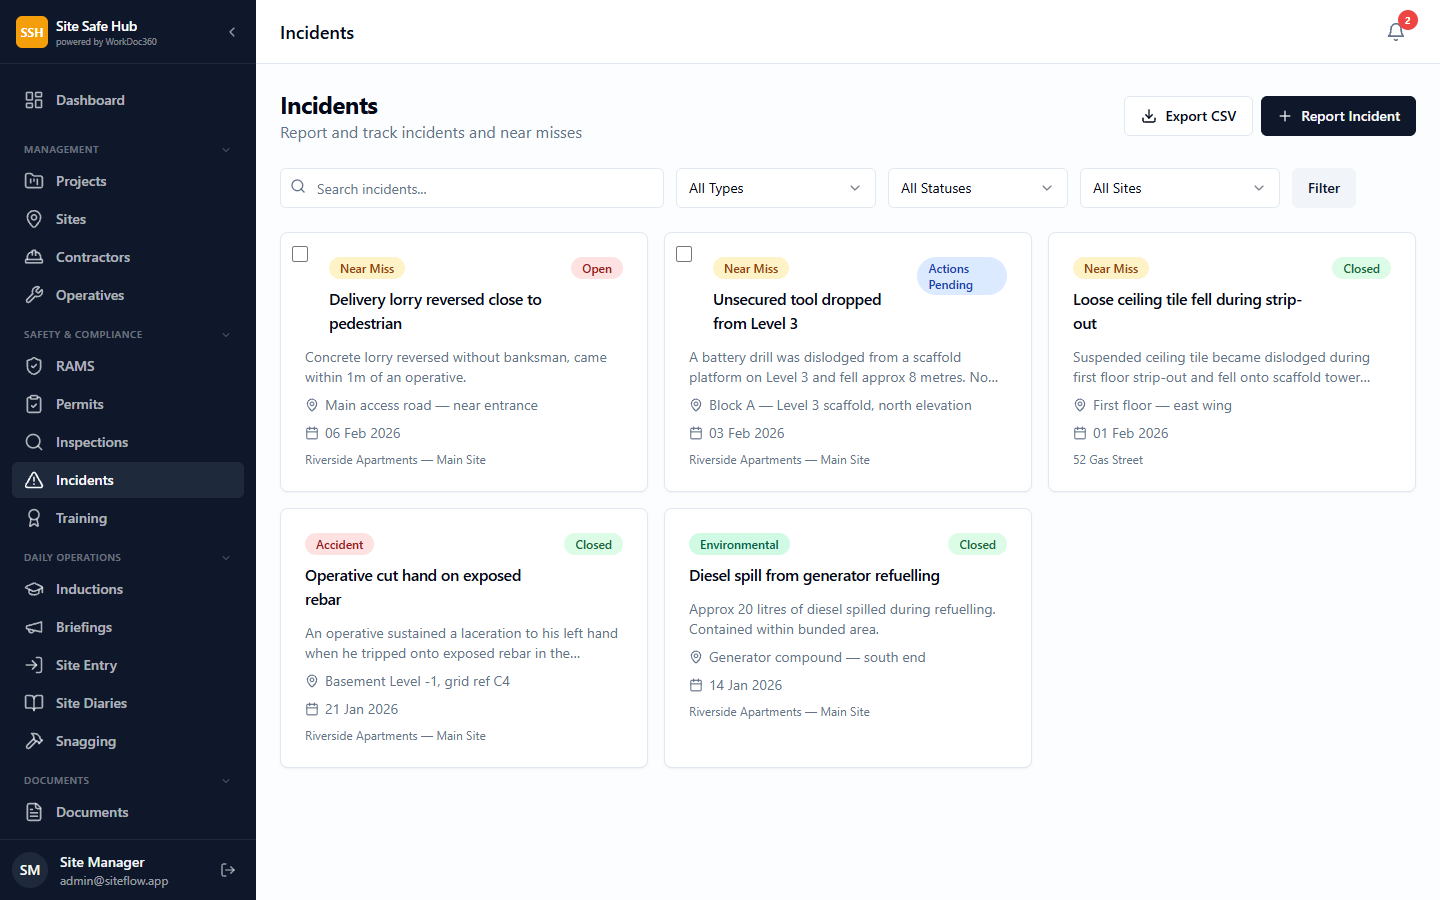
Go to Incidents > “Report Incident”. Select the type (accident, near miss, dangerous occurrence, environmental) and severity. Describe what happened, add photos, and note the location and people involved.
Incidents are classified by severity: minor, moderate, major, or critical. The system automatically flags potential RIDDOR-reportable events for further review.
Add investigation notes, root cause analysis, and contributing factors. Use the AI analysis feature to identify patterns and generate recommendations based on the incident details.
Assign corrective actions, set due dates, and track progress. Once all actions are complete and reviewed, close the incident with final summary notes.
Add witness names, contact details, and statements directly on the incident form. This evidence is critical for RIDDOR-reportable events and HSE investigations.
The system automatically flags incidents as likely RIDDOR reportable based on type and severity — dangerous occurrences, major injuries, fatalities, and accidents with hospital visits are auto-flagged. You can override if needed.
Tip: Near miss reporting is just as important as accident reporting. Encouraging workers to report near misses helps you fix hazards before someone gets hurt.
8. Inspections
Schedule safety, scaffold, fire, welfare, and environmental inspections. Conduct them on-site with your phone and raise corrective actions immediately.
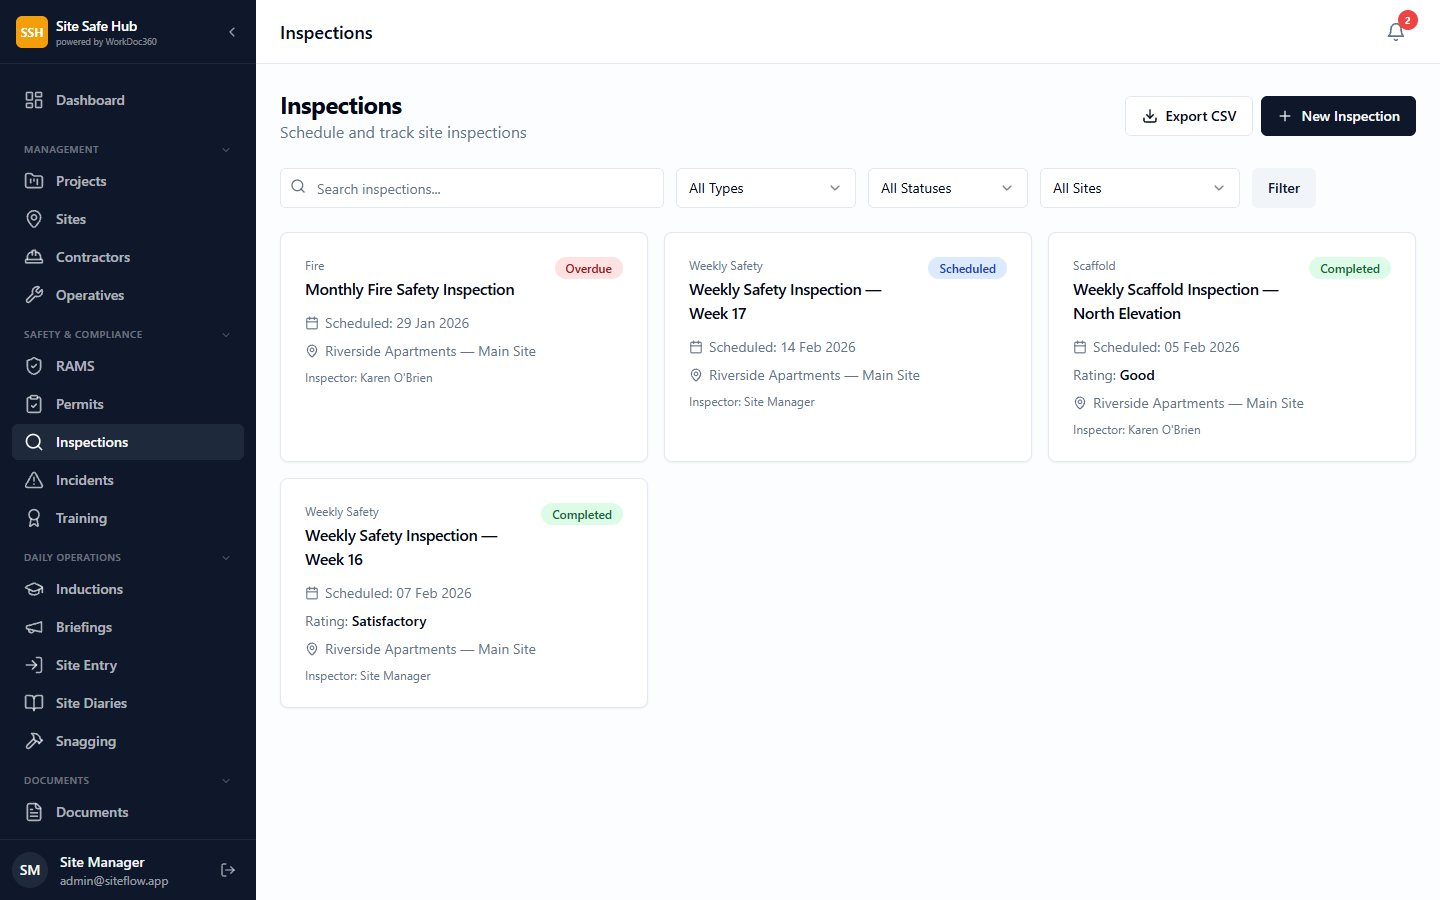
Go to Inspections > “New Inspection”. Choose the inspection type and site, then set the date and assign the inspector.
Open the inspection on your phone. Walk through each checklist item, marking pass/fail/N/A. Add photos and notes for any issues found.
Finish the inspection and add an overall summary. Any failed items can be converted into corrective actions with assigned owners and due dates.
Track corrective actions from the inspection detail page. Once all actions are resolved, the inspection status updates to “Closed”.
When you select an inspection type (Weekly Safety, Scaffold, Fire, Welfare, Housekeeping), a pre-built checklist loads automatically. Mark each item as Pass, Fail, or N/A. Add notes on failures and custom items as needed.
After completing the checklist, select an overall rating from Good to Fail. This rating appears on reports and compliance dashboards.
Tip: Set up recurring inspections (e.g. weekly scaffold checks) so they are automatically created on schedule. You’ll never miss one.
9. RAMS Management
Create risk assessments and method statements, submit them for review, and manage the full approve/reject workflow digitally.
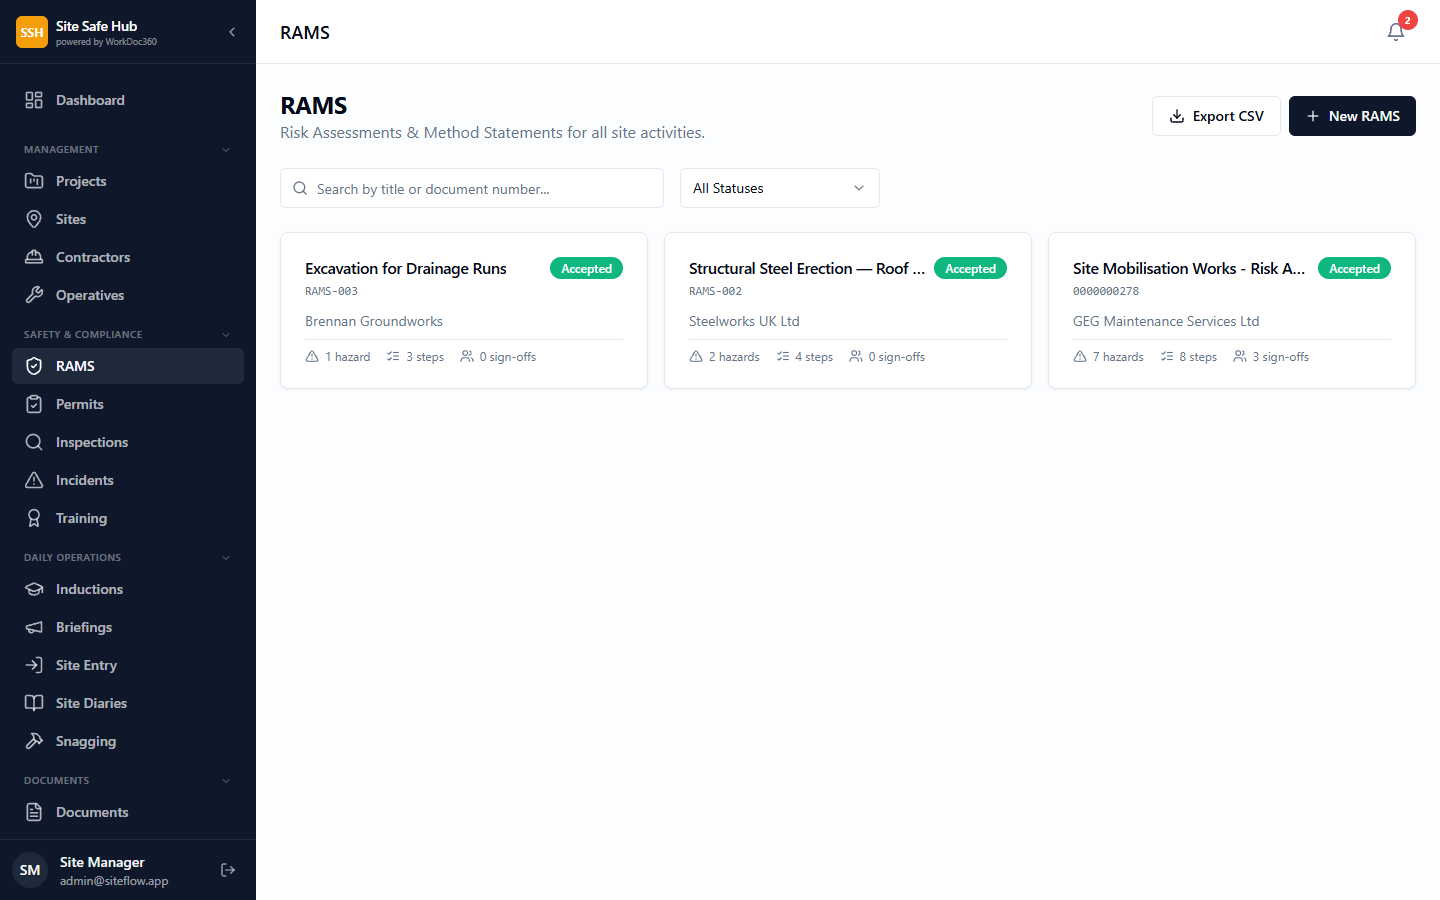
Go to RAMS > “New RAMS”. Describe the activity and site context. Use the AI-assisted generator to produce a comprehensive first draft, or write from scratch.
Identify hazards, add control measures, and score each using the 5×5 risk matrix. The platform calculates inherent and residual risk automatically.
Once complete, submit the RAMS for review. The site manager or principal contractor receives a notification and can approve, request amendments, or reject.
Reviewers add comments, request changes, and formally accept the RAMS. Accepted documents are visible to everyone on the project. The full audit trail is preserved.
Tip: Use the AI generator to draft your RAMS quickly, then have a competent person review and refine it. The AI catches hazards you might overlook in a rush.
10. Documents & Training
Upload and manage documents with expiry tracking. Maintain training records, qualification certificates, and a training matrix for your workforce.
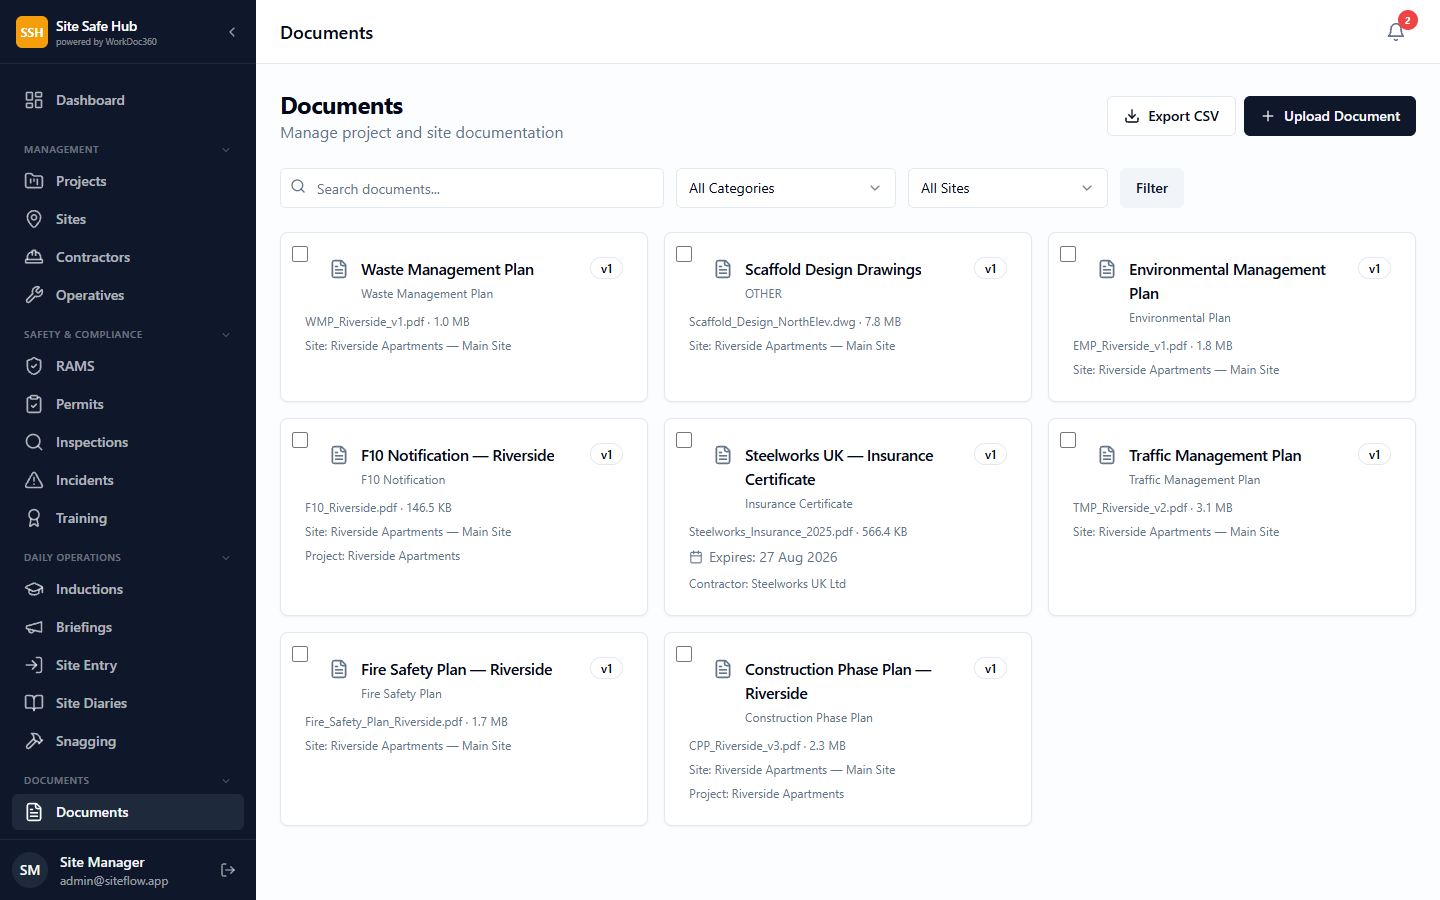
Go to Documents and upload CPPs, fire plans, drawings, certificates, and any other site documentation. Assign categories and set expiry dates where applicable.
Documents with expiry dates are monitored automatically. You receive alerts when certificates or plans are approaching their renewal date.
Track which operatives hold which qualifications (CSCS, SMSTS, SSSTS, first aid, asbestos awareness, etc.). See at a glance who needs retraining.
Operatives and contractors can upload their own cards and certificates. These are linked to their profile and checked during gate entry.
Tip: Use document categories to organise your library (e.g. “Fire Plans”, “Certificates”, “Drawings”). It makes it much faster to find what you need during an audit.
11. Site Diary
Record daily diary entries covering weather, progress, issues, deliveries, and workforce numbers. Submit and review for a complete project record.
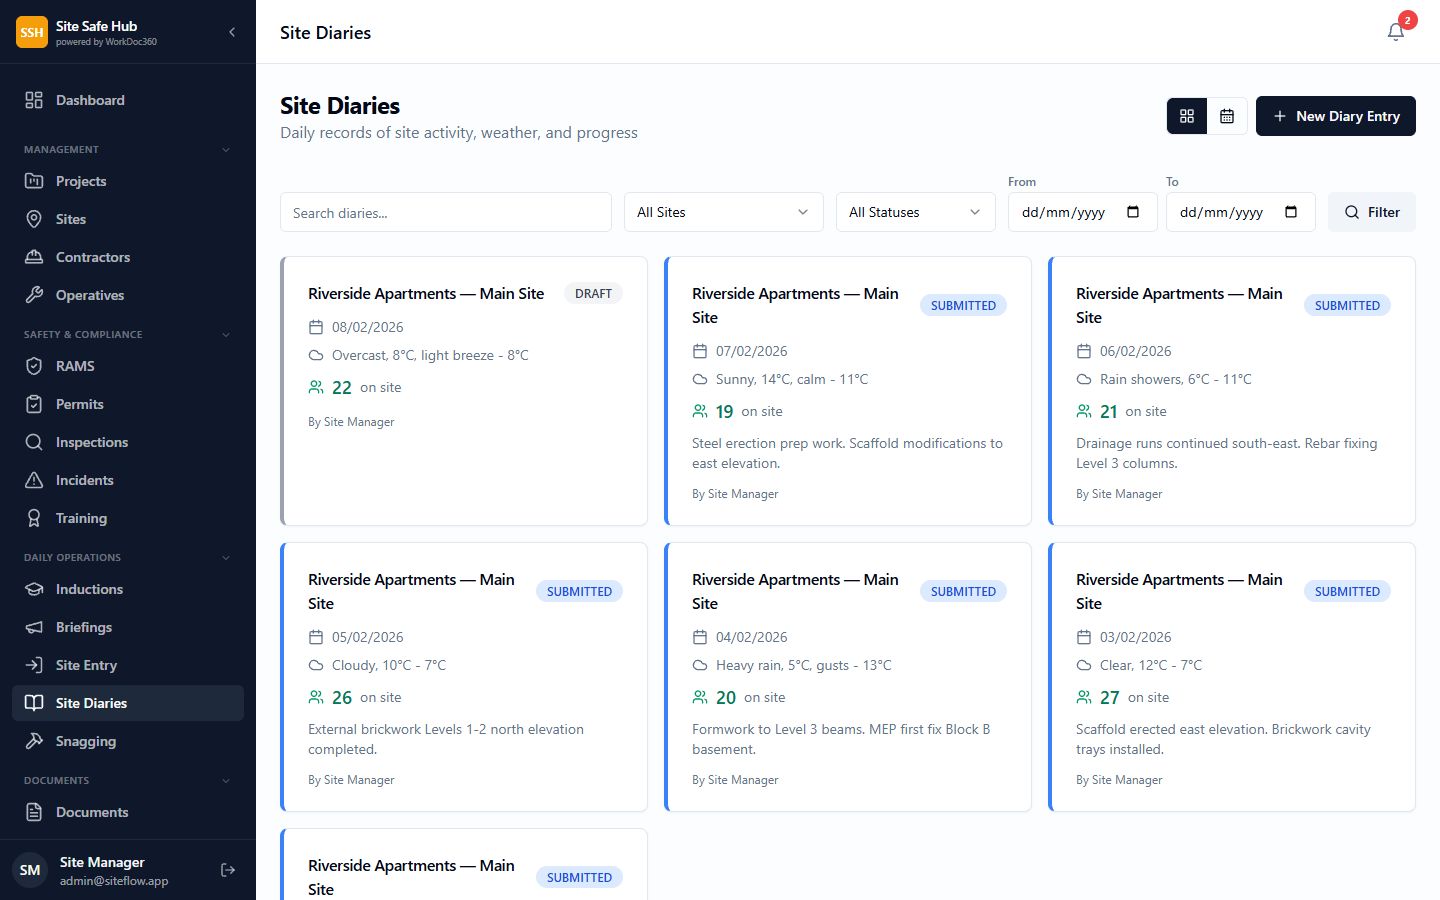
Go to Site Diary > “New Entry”. Select the site and date. The weather is pre-populated from local data — adjust if needed.
Log progress notes, workforce numbers, deliveries, delays, and any issues or instructions received. Add photos for a visual record.
Once complete, submit the diary entry. It is timestamped and locked against further editing for audit integrity.
Browse the diary timeline to review previous days. Filter by site or date range. Export entries for client or contract reports.
Upload photos of site conditions, weather, deliveries, and progress directly to your diary entry. Photos add evidential weight for dispute resolution and compliance records.
Tip: Fill in the site diary at the end of each day while details are fresh. A consistent diary is invaluable for resolving disputes and demonstrating project progress.
12. Snag Management
Raise snags and defects, assign them to contractors with photo evidence, and track resolution through to verification.
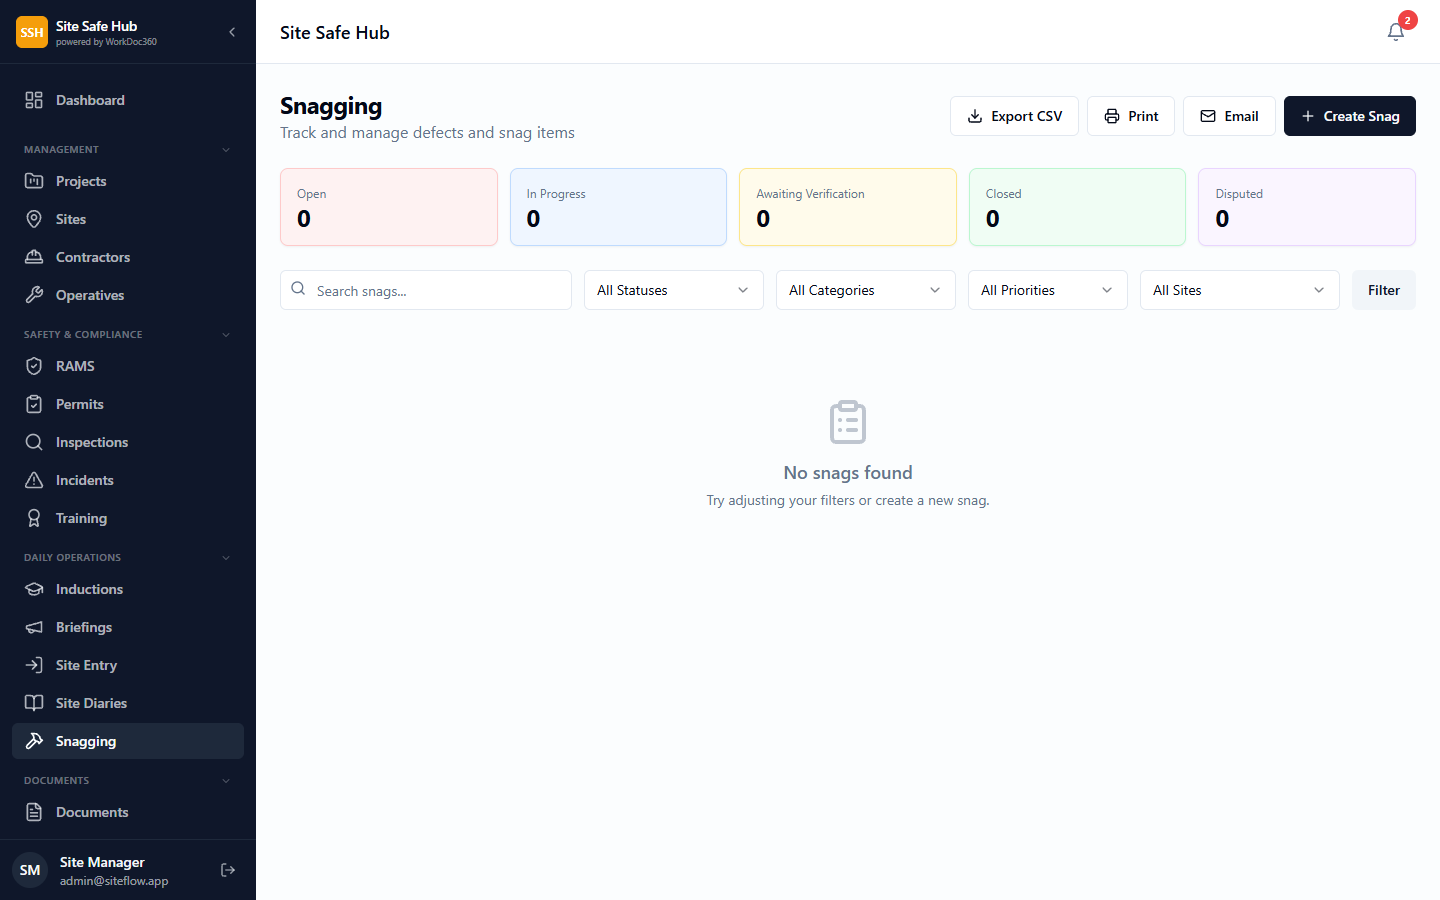
Go to Snags > “New Snag”. Describe the defect, select the location, and take a photo directly from your phone. Set the priority (low, medium, high).
Select the responsible contractor. They receive a notification and can view the snag details, photos, and location in the contractor portal.
The contractor marks the snag as resolved and uploads a photo of the completed fix. Add notes describing what was done.
The site manager reviews the fix, inspects on site if needed, and either approves the resolution or re-opens the snag for further work.
Once a contractor reports a fix, use the Verify & Close panel to upload close-out photos and add verification notes. Only PM+ roles can verify — this creates a complete audit trail from defect to resolution.
Tip: Always include a photo when raising a snag. A picture makes it much clearer what needs fixing and avoids back-and-forth with the contractor.
13. Drawings & Plan Pinning
Upload architectural plans, floor layouts, or specialist drawings and place interactive work pins to track progress at specific locations.
Upload a Drawing
Go to Drawings in the sidebar and click Add Drawing. Select the project, optionally choose a site, name the drawing (e.g. “Ground Floor Plan”, “Kitchen Layout”, “Demolition Plan”), and upload a PDF, PNG, or JPG file.
Place Work Pins
Open a drawing and click Place Pin. Click anywhere on the plan to drop a pin. Fill in the title, select a trade type (Electrical, Plumbing, Demolition, etc.), set the status, and add a description. Pins stay anchored to the correct position when you zoom or resize.
Add Photo Evidence
Click any pin to open its detail panel. Upload before, during, and after photos directly to the pin. Photos are stored against the specific pin record for easy reference.
Upload Revisions & Compare
When a drawing is updated (e.g. post-demolition layout), click New Revision to upload the updated plan. Use the Compare button to view two revisions side by side with all pins overlaid on both — perfect for before-and-after reviews.
Assign Contractors & Operatives
When creating or editing a pin, assign a contractor and a specific operative to the task. The system cross-references the QR sign-in records to show a live green (on site) or red (off site) indicator next to each operative — so you can see at a glance who is available on site right now.
Set Suggested Start & End Dates
Add suggested start and end dates to each pin so everyone knows when the work is expected to happen. Dates appear in the pin detail panel and help with scheduling trades across the drawing.
Capture Photos with Camera
Click Take Photo on any pin to open the device camera directly. Photos are captured with GPS coordinates and timestamp metadata, giving you geotagged evidence of progress or issues at the exact pin location.
Filter & Review
Use the trade and status filters to focus on specific work. For example, filter by “Electrical” and “In Progress” to see only active electrical work. Pin colours indicate status: grey (not started), blue (in progress), green (complete), red (blocked).
Upload Revisions & Compare
When a drawing is updated (e.g. post-demolition layout), click New Revision to upload the updated plan. Use the Compare button to view two revisions side by side with all pins overlaid on both — perfect for before-and-after reviews.
14. Audit Trail
View a complete history of who did what and when across your organisation.
Navigate to Audit Trail in the sidebar (admin-only). The page shows all recorded actions across your organisation.
Use the Action dropdown to filter by Create, Update, Delete, Login, or Status Change. Use the Entity Type dropdown to focus on specific modules like permits, incidents, or inspections.
Type a name in the search field to find actions by a specific team member. Each entry shows the user, action, entity type, and timestamp.
Tip: The audit trail is essential for compliance — it provides evidence that your team followed proper procedures, which is exactly what HSE inspectors and client auditors look for.
15. Expiry Calendar
See all upcoming expiries across documents, permits, training, and contractor insurance in one unified view.
Navigate to Expiry Calendar under CDM Compliance in the sidebar. It loads all items expiring within the next 90 days.
Use the 30, 60, or 90 day buttons to focus on the most urgent items. Items expiring within 7 days are flagged red, within 30 days amber, and beyond 30 days green.
Items are grouped into four sections: Documents, Permits, Training, and Contractor Insurance. Click any item to navigate directly to its detail page.
Tip: Check the Expiry Calendar first thing each Monday. It replaces having to visit 4-5 different screens to find what’s expiring across your sites.
16. Site Alerts
Send urgent alerts to all operatives currently on site via email, and keep a record of every alert sent.
Navigate to your site’s dashboard. You’ll see a red Send Alert button in the Quick Actions section.
Select an alert type (Emergency, Safety Warning, Weather Alert, Site Notice, Evacuation, or General), enter a title and message. The dialog shows how many operatives are currently on site.
Click Send Alert. The system emails all on-site operatives who have email addresses and notifies all site managers. Emergency and Evacuation alerts are marked URGENT in the subject line.
Scroll down on the Site Dashboard to see Recent Alerts — the last 5 alerts sent for this site, showing who sent them, when, and how many emails were delivered.
Tip: For genuine emergencies, always use your radio or PA system first — email is not instant. Site Alerts create a written record for the safety file and ensure everyone gets the details in writing.
17. Contractor Portal
Self-service access for contractors: manage operatives, upload documents, track compliance, and view site assignments — all from one dashboard.
When a site manager adds your company, you receive an email invitation. Click the link to set up your contractor portal account.
Register the workers you plan to send to site. Upload their CSCS cards, training certificates, and any required qualifications.
Upload your insurance certificates, SSIP accreditations, and company RAMS. Set expiry dates so the system reminds you when renewals are due.
Your dashboard shows your overall compliance score, outstanding requirements, assigned sites, and any snags or actions assigned to you.
Tip: Keep your documents up to date in the portal. When everything is green, site managers can approve you faster and your operatives can get on site without delays.
18. Mobile & Offline
Install Site Safe Hub as a progressive web app on any device. Use core features offline and sync automatically when you’re back online.
Open Site Safe Hub in your mobile browser. Tap “Add to Home Screen” (or the install prompt) to install it as an app. No app store needed.
Core features like site sign-in, incident reporting, and inspections work offline. Data is stored locally on your device until a connection is available.
When you reconnect to the internet, all offline data syncs automatically. You’ll see a confirmation once everything is uploaded.
Enable push notifications to receive real-time alerts for new incidents, permit expiries, overdue inspections, and more — even when the app is closed.
If site Wi-Fi drops during induction, the kiosk saves all data locally — photos, CSCS card, signature, and form details. When connectivity returns, everything syncs automatically. If the browser closes, you can resume the induction where you left off.
Tip: Install the PWA on your phone for the best experience. It launches faster than the browser, works offline, and sends push notifications — just like a native app.
19. Cost Dashboard
Monitor your AWS and infrastructure costs, set budget thresholds, and receive automatic alerts when spend exceeds limits.
Navigate to Cost Dashboard in the sidebar (admin-only). The page shows your current month’s spend, category breakdown, and 6-month trend.
Expand the Integration Status panel at the top. Follow the setup steps to configure your AWS credentials. Once connected, click ‘Sync AWS Costs’ to pull real spend data from your AWS account automatically.
For non-AWS costs (Railway hosting, MailerSend emails, domain names, SSL certificates), click ‘Add Cost Entry’ and enter the provider, amount, and month. These appear alongside AWS costs in the summary.
Click ‘Configure Budgets’ to set your monthly spend limit. Set warning (default 75%) and critical (default 90%) thresholds. When costs hit the critical level, an automatic email alert is sent to your notification address.
Cost alerts go to the Notification Email configured in Settings > Organisation Details. Default: [email protected]. Change this to any email address to receive budget breach warnings.
Tip: Check the Cost Dashboard at the start of each month. AWS costs can creep up — catching overruns early prevents billing surprises.